Create a shared folder
It is recommended that you create a shared folder to organize and manage the files you wish to share.
- Sign in to https://envolvellccommunities-my.sharepoint.com/my
- Click the “+ Add new” button on the top left of the screen
- Select Folder from the list
- Enter and Name, select a color (optional), then click Create
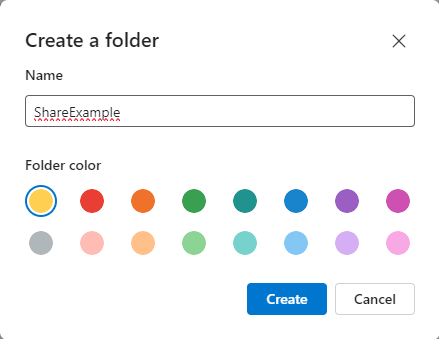
- The new folder will be listed in the My Files section
Share a file or folder
To share a newly created folder or share an existing one, follow the steps below.
- Sign in to https://envolvellccommunities-my.sharepoint.com/my
- Locate and select the folder you wish to share
- Click Copy link from the top menu
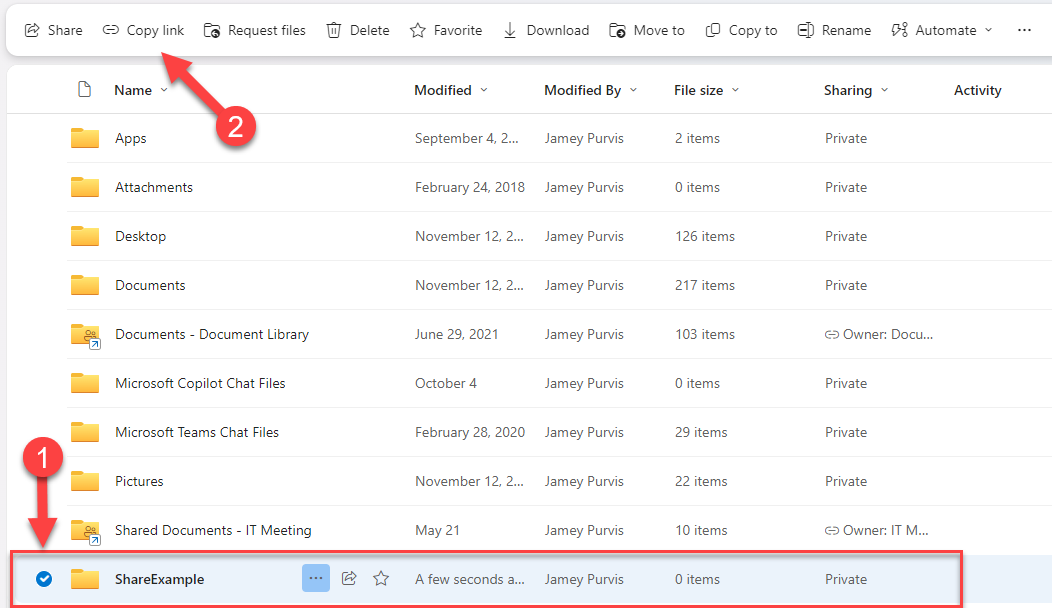
(If prompted, Allow the page to access your clipboard)
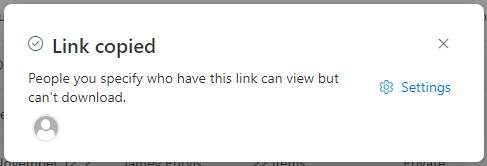
- When you receive the Link copied notification, click Settings

- The Link settings pop-up window will appear.

- Select People you choose
- Type the email address for the person you wish to share with. Note that email address must be selected after typing and will appear as shown in the screenshot!
- In the More Settings section, select the appropriate access type from the following choices
- Can edit – Grants Write access to those with the link
- Can view – Grants Read Only access to those with the link
- Can’t download – Grants Read Only access and restricts the convenience of downloading the file. Note that this does not prevent other methods for obtaining the document, such as screenshots or pictures taken with external cameras!
NOTE: You must complete these steps for each type of access you wish to grant. For example, if you wish to set some users to Can edit permissions and some to Can view, you must complete these steps twice; once for each group.
- Click Apply
- You will receive a confirmation message
- To share the file, you must email the copied link to the user directly
NOTE: The system does not automatically generate a notification for the recipient!
Managing Share Access
You can use the Manage Access functions to review links, edit permissions, or stop sharing the folder or files. Note that this functionality must not be used to set the original permissions for technical reasons.
- Sign in to https://envolvellccommunities-my.sharepoint.com/my
- Locate and select the folder (1) you wish to edit
- Click the ellipsis button (2) to open the control panel fly-out
- Click Manage Access (3)

- In the Manage Access panel, click the Links tab to view the links.
- You may Copy the link that is appropriate for your guest.
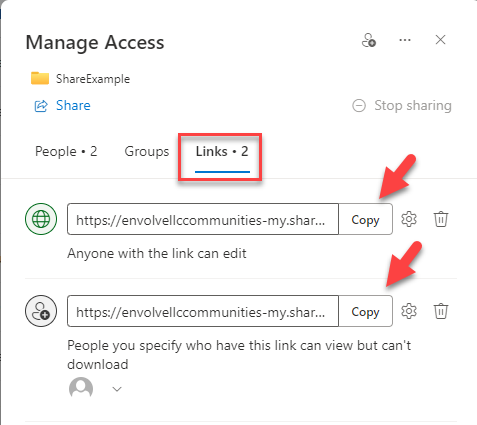
- To disable access for an individual, navigate to the Link tab using the steps above.

- Expand the This link works for section (1)
- Locate the user you wish to remove, then click the “X” icon (2)
- Click Remove to confirm when prompted
- To stop sharing the file or folders, return to the Manage Access panel
- Select the Links tab
- Delete each link

- Click Remove to confirm when prompted
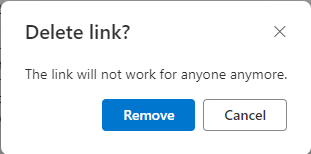
- The file or folder will no longer be shared. The original links will no longer work for those the links were shared with.
Was this article helpful?
That’s Great!
Thank you for your feedback
Sorry! We couldn't be helpful
Thank you for your feedback
Feedback sent
We appreciate your effort and will try to fix the article